Creating a Facebook Group is a great way to build a community, whether for your business, interests, or social causes. The best part? It’s completely free and allows you to engage with people who share similar interests.
Step 1: Creating Your Facebook Group
1.1 Log Into Facebook
First, go to Facebook and log in to your account. If you’re using a mobile device, open the Facebook app.
1.2 Navigate to the “Groups” Section
- On a computer: Click on the “Groups” section in the left-hand menu.
- On a mobile phone: Tap the menu (☰) at the bottom right and select “Groups.”
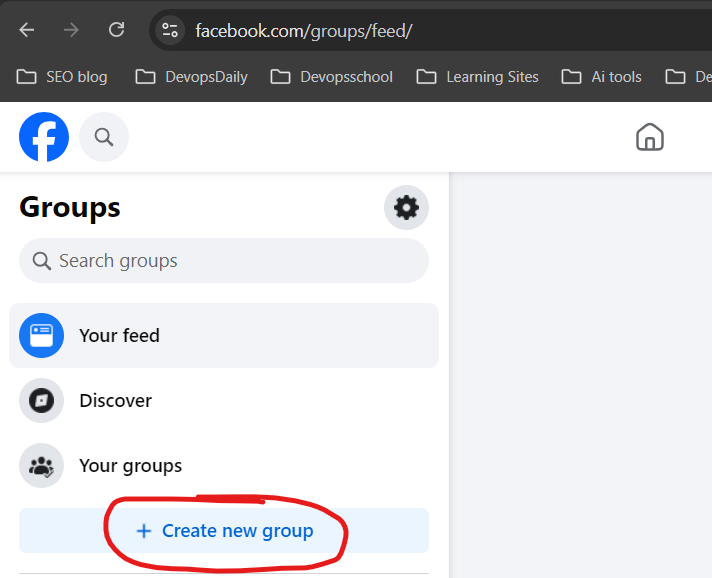
1.3 Click “Create New Group”
Once you’re inside the Groups section, you’ll see a “Create New Group” button. Click on it!
1.4 Choose a Group Name
Pick a clear and meaningful name for your group.
- If it’s for a business: “Marketing Tips for Small Businesses”
- If it’s for fun: “Dog Lovers Club”
- If it’s a support group: “Mental Health Awareness Community”
Make sure it reflects the purpose of the group so people know what to expect.
1.5 Set Privacy Settings
Facebook offers two privacy options:
- Public – Anyone can see the posts and join without approval.
- Private – Only members can see and interact with posts.
➡️ Pro Tip: If you want a close-knit or exclusive community, go for Private. If it’s for general discussion, Public is fine.
1.6 Decide on Group Visibility
- Visible – Anyone can find your group and request to join.
- Hidden – Only invited members can see it. (Best for secret projects or exclusive clubs.)

Step 2: Customizing Your Group
Now that you’ve created your group, let’s make it visually appealing and functional.
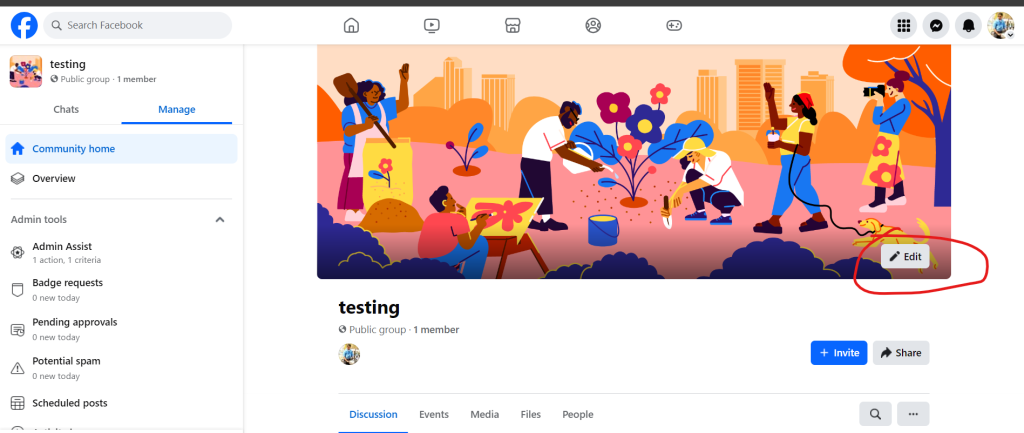
2.1 Add a Cover Photo
Think of this as your group’s first impression!
- Ideal size: 1200 x 628 pixels
- Use a relevant and attractive image
- You can create a custom banner using Canva (a free design tool)
2.2 Write a Group Description
Your description should tell newcomers what your group is about in a few sentences.
Example:
“Welcome to the ‘Healthy Living Community’! This is a space to share tips, recipes, and motivation for a healthier lifestyle. Be kind, be respectful, and let’s support each other!”
2.3 Set Up Group Rules
Click “Group Rules” in the settings and add a few basic rules, such as:
✅ Respect everyone
🚫 No spam or self-promotion
💡 Stay on topic
➡️ Pro Tip: Having rules helps avoid conflicts and keeps discussions meaningful.
Step 3: Managing Group Members & Roles
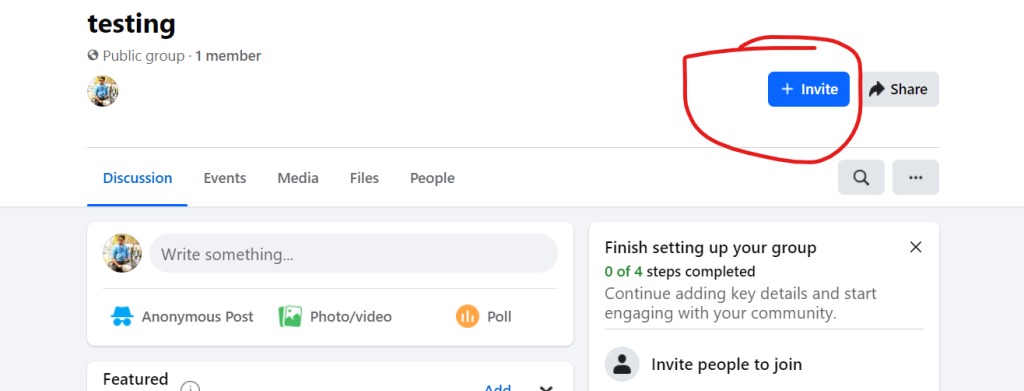
3.1 Invite People to Join
You can manually invite friends or share your group link on social media, emails, or your website.
3.2 Approve or Decline Membership Requests (For Private Groups)
If you set the group to Private, you’ll need to approve new members. You can:
- Ask membership questions (e.g., “Why do you want to join?”)
- Filter requests based on mutual friends or interests
3.3 Assign Admins and Moderators
Running a group alone can be tough! Here’s how to assign help:
- Go to “Members”, find a trusted person, click “… More”, then “Make Admin” or “Make Moderator”.
- Admins have full control, while Moderators can help manage posts and member activity.
Step 4: Posting & Engaging with Members
4.1 Pin Important Announcements
If you have rules, upcoming events, or key info, create a post and pin it to the top so everyone sees it.
4.2 Schedule Posts
Consistency is key! You can schedule posts to appear at specific times to keep engagement active.
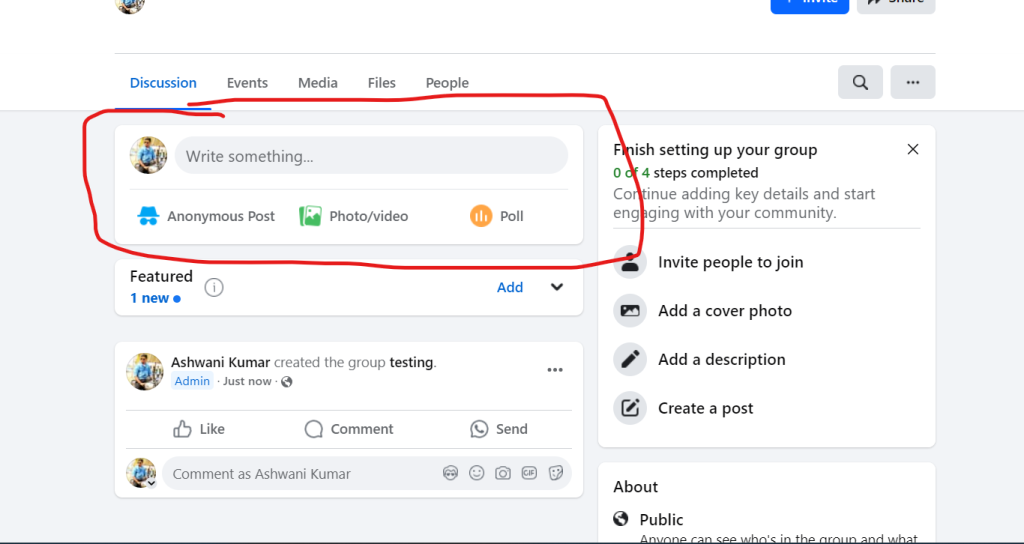
4.3 Use Polls, Questions, and Events
To keep things fun and interactive, try:
- Polls – Ask what members think about a topic.
- Q&A – Post discussion starters.
- Events – Host live Q&A sessions or webinars.
➡️ Pro Tip: People love engaging content. Mix it up with memes, gifs, or quick challenges!
Step 5: Moderation & Security Features
5.1 Approve or Decline Posts
If you want quality content, enable Post Approval so only relevant posts go live.
5.2 Monitor Discussions
Use Facebook’s Keyword Alerts to flag inappropriate words.
5.3 Mute, Remove, or Ban Members
If someone is causing trouble, you can:
🚫 Mute them (temporarily block posting)
🚫 Remove them (kick them out)
🚫 Ban them (they can’t rejoin)
➡️ Pro Tip: A well-moderated group stays positive and engaging!
Step 6: Growing Your Group 🚀
Your group is set up! Now, let’s bring in more members and keep it thriving.
6.1 Share the Group Link Everywhere
- On your Facebook profile
- In other related groups (if allowed)
- On your website, blog, or emails
6.2 Run Fun Challenges or Giveaways
- Example: “Share a photo of your pet – the cutest one gets a feature on our page!”
6.3 Encourage Members to Invite Others
Word of mouth is powerful! Ask members to invite like-minded friends.
This step‑by‑step guide for setting up a Facebook Group is very clear and practical. I liked how it explains the basics like naming the group, choosing privacy settings, and adding a cover photo. The tips on inviting members and making rules are helpful too. It will be great for anyone looking to build a strong community.