Can’t Make Your Facebook Page Stand Out?
Creating a Facebook Page might seem easy, but configuring it for success? That’s where most people hit a wall. You’ve seen it before—pages that are poorly set up, missing key information, and failing to engage their audience. If you’re not careful, your page could end up in the same boat, lost in the sea of social media noise.
Don’t Let Your Brand Get Lost in the Crowd!
Imagine this: You’ve set up a Facebook Page, but it’s not attracting any followers. Your posts go unnoticed, and worse, people can’t find the information they need. Your brand starts to feel invisible, and you’re missing out on potential customers. Sounds frustrating, right? But it doesn’t have to be this way.
How to Set Up Your Facebook Page Like a Pro
Ready to make some magic happen? Follow these easy, step-by-step directions to get your Facebook Page profile up and running so it’s not only noticed but gets engaged and grows, too.
Step 1: Create Your Facebook Page
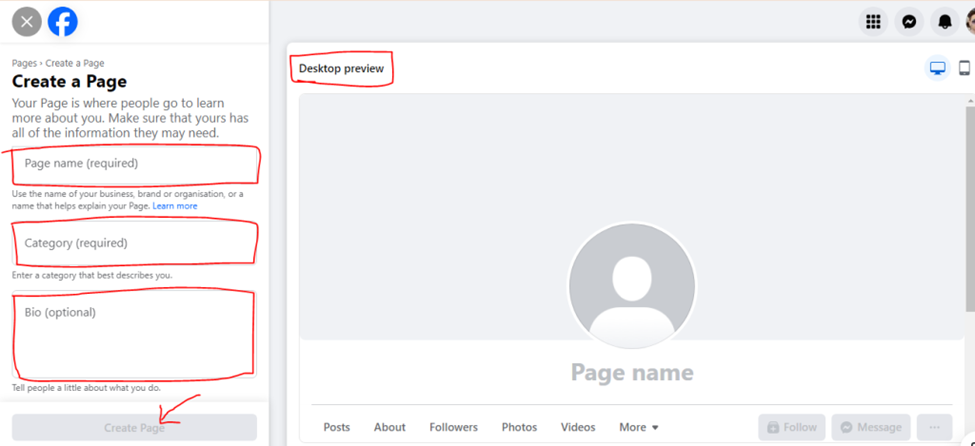
a. Start Here: Log in to your Facebook account and go to the Pages area. Tap on Create.
b. Name It: Choose a name that identifies with your brand or business.
c. Category & Description: Identify the category that best describes your business, and fill in the description with a short blurb that tells people what you’re all about.
Step 2: Add a Profile Picture
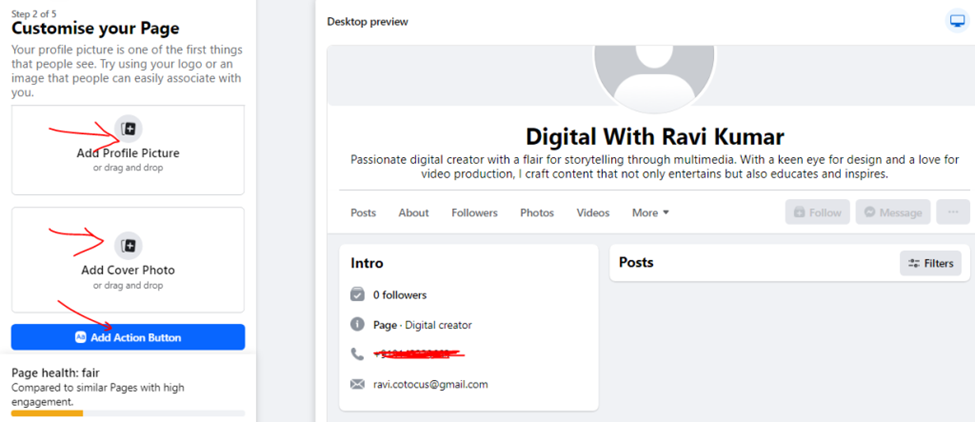
a. Visual Identity: Add your logo or another very recognizable picture of the brand. Be precise and professional; first impressions count!
b. Get the Right Size: 170×170 pixels is the recommended size. Make sure it’s sharp and clear.
Step 3: Add a Cover Photo
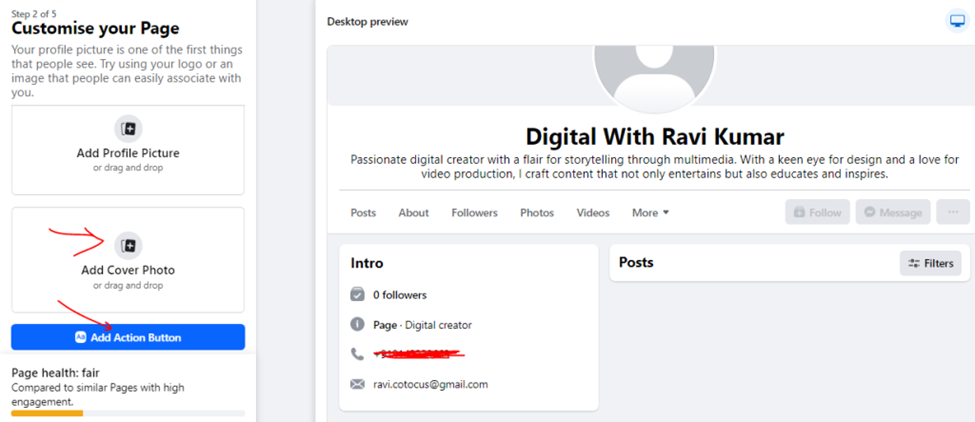
a. Make a Statement: Your cover photo is like your personal billboard. Share an image that represents your business, or your latest offer.
b. Best Dimensions: 820×312 pixels for optimal viewing.
Step 4: Complete the About Section
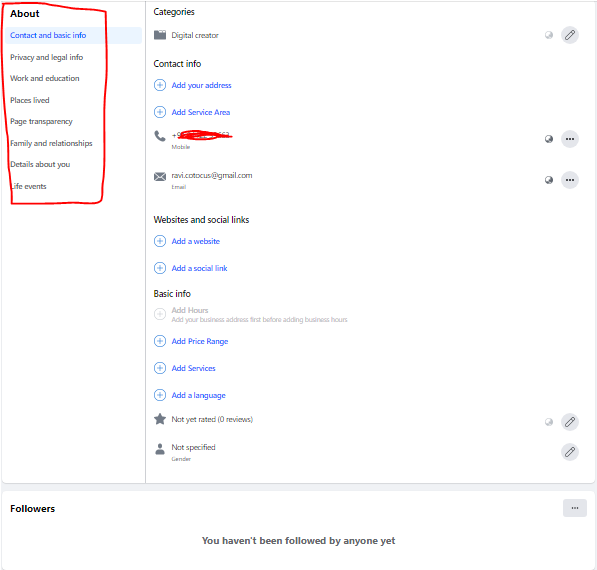
a. Be Informative: This is where visitors get to know you. Add a compelling description, your contact info, and your website.
b. Add Hours & Location: If you have a physical location, then it’s necessary. Don’t leave potential customers in the dark!
Step 5: Set Up a Call-to-Action Button
a. Drive Action: Whether it’s “Contact Us,” “Shop Now,” or “Sign Up,” this button will lead visitors into action.
b. Quick Setup: Below your cover photo, tap Add a Button and link it to the action you want.
Step 6: Assign Page Roles
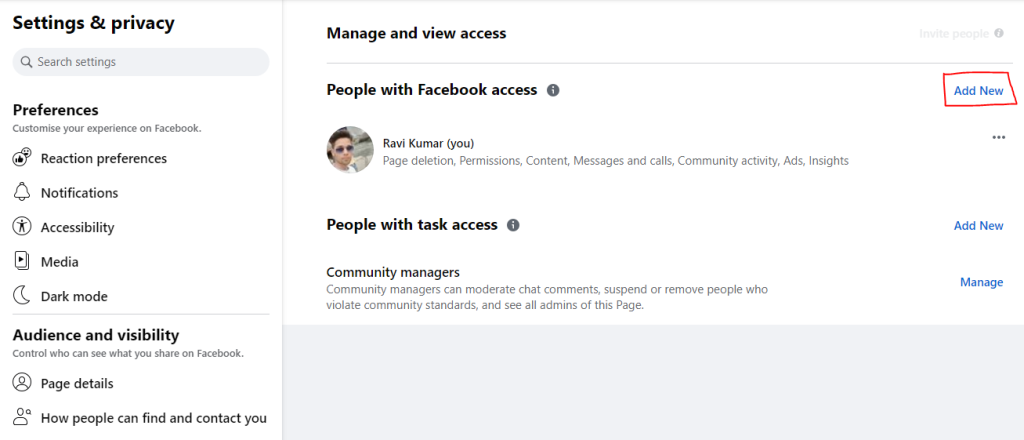
a. Teamwork: If others help manage the page, then change their roles to Admin, Editor, or Moderator. This will keep everyone literally on the same page.
b. Easy Management Head to Settings > Page Roles to add your team members.
Step 7: Customize Your Page Tabs
a. User Experience: Customize the tabs on your page to suit your business activities, like Posts, Photos, Videos, and Reviews
b. Make it Relevant: You can turn them on and off, and reorder them in Settings > Templates and Tabs to what’s most relevant to people.
Step 8: Enable Messenger
a. Stay Connected: This lets people contact you privately with Messenger turned on. It’s a great way to provide fast customer support.
b. Set Up Automated Responses: Keep the conversation going, even when you’re away. You can use instant replies or away messages for this.
Step 9: Verify Your Page
a. Build Trust: Verified pages are more credible. It’s a small step that can make a big difference.
b. Get Verified: Go to Settings > General > Page Verification and follow the steps to verify your page.
Step 10: Publish and Promote
a. Go Live: After configuration, hit Publish to publish your page for everyone on the internet.
b. Spread the Word: You can invite friends, share your page, and of course run Facebook Ads if you have the budget.
Step 11: Keep It Fresh
a. Be Consistent: Regularly post, reply to comments and messages, and keep fresh. Any active page is engaging in its own way.
b. Monitor and Adjust: Stay on top of your performance page, making any adjustments necessary to help drive more engagement.
Conclusion
You’re Ready to Rock Your Facebook Page!
With these steps, you are all set with your Facebook Page. No more blending into the background—your brand becomes ready to stand out, engage, and grow. What are you waiting for? Get started today on configuring your Facebook Page and watch your online presence soar!
Thanks,
This article was very useful and easy to read. I liked how it explained each step clearly, from adding a profile photo to filling in the About section. It helped me understand what details matter most when setting up a Facebook Page that people will engage with. The tips about call‑to‑action buttons and completing all page info were especially helpful. I feel more confident now to build and grow my page the right way.