In this complete tutorial, you are going to find all of the required steps that you should follow in order to successfully use your own phone number in Twilio to send WhatsApp notifications. We’ll walk you step by step from verifying your Meta (Facebook) Business Account, to choosing or creating a WhatsApp Business Account (WABA), and connecting it to Twilio.
Whether you’re a developer, a business, or a system integrator, this tutorial makes sure that you have a defined, detailed path from getting started with the initial setup all the way to having a production-level WhatsApp messaging solution. With the helpd of these steps you will be able to:
- Use your own phone number (BYON – Bring Your Own Number) instead of Twilio’s own default sandbox number.
- Get your Meta Business Account to access the WhatsApp Business API.
- Connect or create a WhatsApp Business Account (WABA) to handle your sender and message templates.
- Easily add WhatsApp messaging to your platform and send messages, OTPs, alerts, and notifications through WhatsApp.
Prerequisites
Before you go ahead and connect your own phone number to Twilio for the WhatsApp Business API, you need to make sure that you meet the technical and business requirements from Twilio and WhatsApp. Satisfying these needs early on permits a more efficient new customer screening process, minimizes unanticipated circumstances and decreases the possibility of delays at the time of business verification or phone number approval. With thorough preparedness, the integration process is much smoother and ideally you will be able to start receiving WhatsApp messages faster.
- An Upgraded Twilio Account (with Billing Set Up):- You must have a paid Twilio account. A free (trial) Twilio account does not support production-ready WhatsApp integrations.
- A WhatsApp-compatible phone number (not tied to another WhatsApp account)
- A Meta (Facebook) Business Manager account (preferably verified)
- Admin access to both Twilio and Meta accounts
- Supporting business documents (for verification)
Check If Your Business Account Is Set Up and Verified
Step 1: Log into Facebook Business Manager
- Visit: https://business.facebook.com/
- Sign in using your Facebook credentials (the one with admin access to the business).
Step 2: Access Business Settings
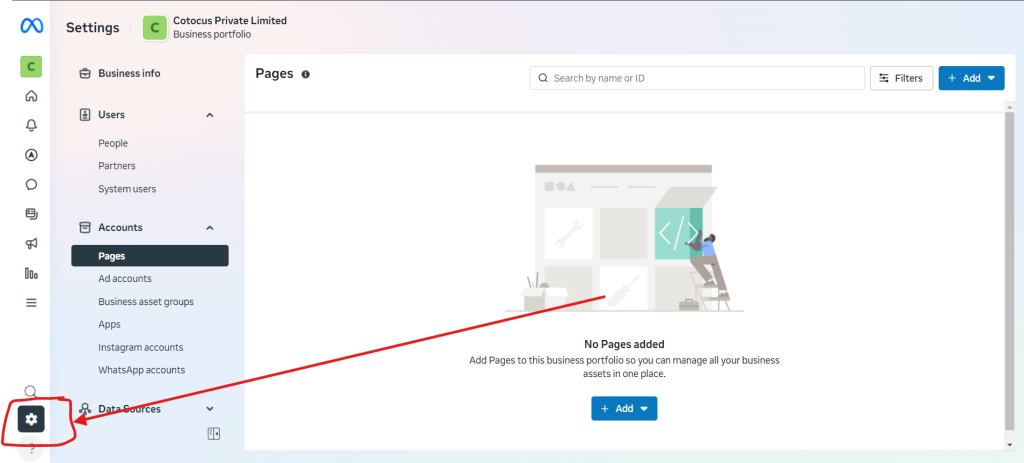
- Once logged in, click the gear icon ⚙️ in the bottom-left corner.
- This will open your Business Settings dashboard.
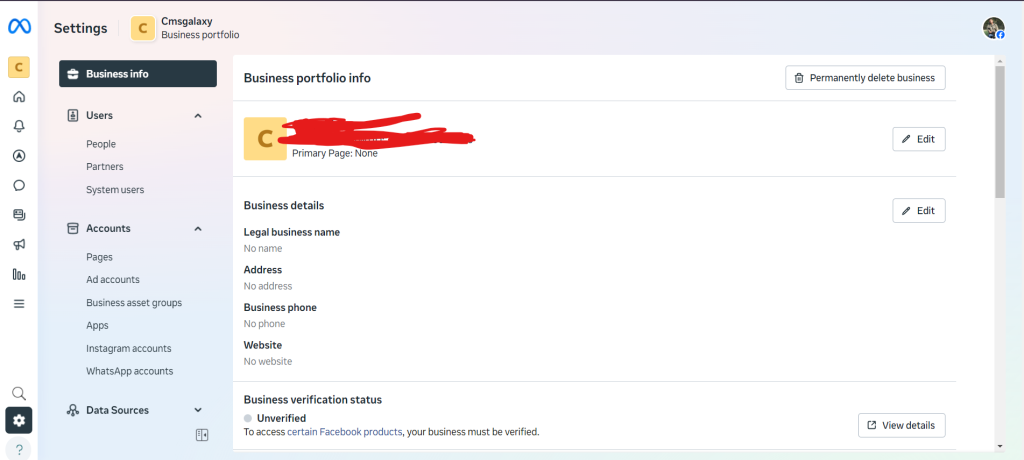
Step 3: Check Business Verification Status
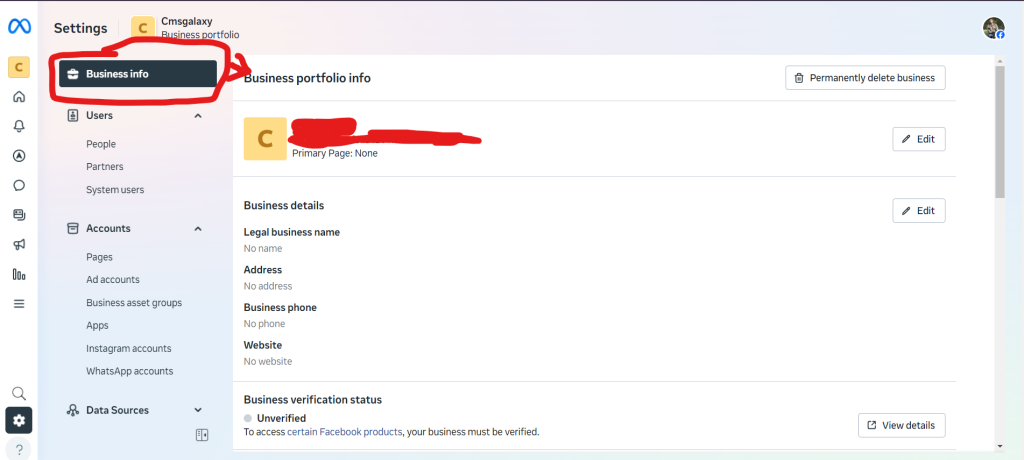
- In the left sidebar, scroll and select Business Info.
- You will see details like:
- Business name
- Business ID
- Business Verification Status
Step 4: Understand the Status Indicators
| Status | Meaning |
|---|---|
| ✅ Verified | Your business is fully verified. Green checkmark and date will appear. |
| ⏳ Under Review | Your submitted documents are being reviewed by Meta. |
| ❌ Not Verified | You haven’t started verification or it was not approved. |
Start Business Verification (If Not Verified)
If your business is not verified, you need to begin the verification process to unlock access to WhatsApp API and other advanced features.
Step 1: Go to Security Center
- In Business Settings, go to the Security Center tab in the sidebar.
- If your business is not verified, you’ll see a “Start Verification” or “Continue Verification” button.
Step 2: Enter Business Information
- Click Start Verification.
- Fill out your legal business details, including:
- Official business name
- Address
- Business phone number
- Website (optional but recommended)
Step 3: Upload Supporting Documents
You’ll need to submit documents that prove your business’s legal identity. Examples include:
| Document Type | Use |
|---|---|
| Government-issued license | Business registration certificate, company license |
| Proof of address | Utility bill, bank statement, or lease agreement with matching address |
| Legal representative info | Passport, driver’s license of the authorized person |
Select or Create a WhatsApp Business Account (WABA)
How to Check and Select a WhatsApp Business Account (WABA)
Step 1: Open Facebook Business Manager
- Go to https://business.facebook.com/
- Log in with your Facebook account that has admin access to your business.
🧭 Step 2: Navigate to Business Settings
- In the left sidebar, scroll down and click on the gear icon (⚙️) labeled “Business Settings.”
📂 Step 3: Access WhatsApp Accounts
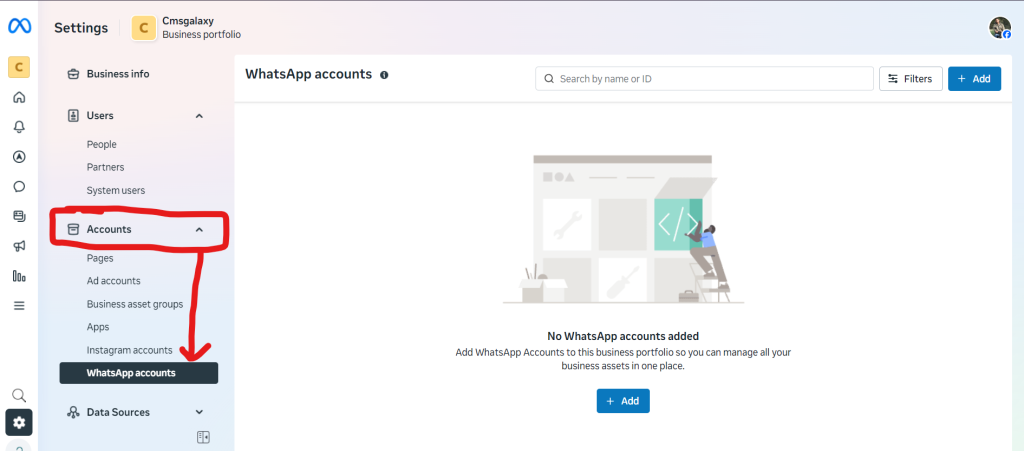
- In Business Settings:
- Go to Accounts > WhatsApp Accounts
- You’ll now see a list of all WhatsApp Business Accounts (WABAs) connected to your Business Manager.
✅ Step 4: Check Existing WABAs
- Each entry will show:
- WABA name
- WABA ID
- Phone numbers attached
- Status (e.g., Verified, Pending)
➕ Step 5: Create a New WhatsApp Business Account (If Needed)
If you don’t see any WABA or want to create a new one:

- Click the blue “+ Add” button.
- Follow the prompts to:
- Name your WhatsApp Business Account
- Select your Business Manager
- Add a phone number (make sure it’s not tied to personal WhatsApp)
- Verify the number (via SMS or Voice OTP)
- Add a display name and category
- Submit for approval if required
📝 Note: This newly created WABA will also appear in your Twilio dashboard later when integrating WhatsApp API.
Linking WhatsApp Business Account to a Facebook Page (Optional but Recommended)
📱 Step 1: Open the WhatsApp Business App on Your Phone
- Make sure you’re using the WhatsApp Business App, not regular WhatsApp.
- Log in using the same business number tied to your WABA.
🔧 Step 2: Navigate to Business Tools
- Tap the three dots (⋮) in the top right corner (on Android) or go to Settings (on iPhone).
- Select Business Tools.
- Tap on Facebook & Instagram integration.
🔐 Step 3: Log into Your Facebook Account
- You’ll be prompted to log into Facebook.
- Use the credentials that have admin access to your Facebook Page.
📄 Step 4: Choose the Facebook Page to Link
- After login, a list of your Facebook Pages will appear.
- Select the Page you want to connect with your WhatsApp number.
🔗 Step 5: Tap “Connect WhatsApp”
- Once selected, tap Connect WhatsApp.
- Facebook will now:
- Link the number with the selected Page.
- Show a WhatsApp button on your Page (optional).
- Allow you to run Click-to-WhatsApp ads from Facebook or Instagram.
Prepare Your Phone Number for WhatsApp Registration
1. The number must not be tied to an existing WhatsApp account
What this means:
- The phone number you want to use with the WhatsApp Business API (e.g., via Twilio) must be unused or disconnected from any current WhatsApp or WhatsApp Business app.
- This includes:
- Regular WhatsApp Messenger (used for personal use)
- WhatsApp Business app (used by small businesses)
Why?
- The WhatsApp Business API is a different system altogether.
- A phone number can only be registered in one place — either in the app or via API, not both at the same time.
2. If previously used, delete the WhatsApp account from the app
If your number has been used in WhatsApp before:
You must completely delete the WhatsApp account from within the app — simply uninstalling the app is not enough.
How to delete the account:
Open the WhatsApp or WhatsApp Business App:
- Go to Settings > Account > Delete My Account
- Enter the phone number
- Confirm deletion
This will:
- Remove your number from WhatsApp servers
- Free it up for use with WhatsApp Business API
- Erase all chat history and media from your device (locally)
3. The number must be able to receive a voice or SMS verification code
To register the number with the WhatsApp API (via Twilio or Meta), you must verify ownership by receiving a 6-digit code.
You can choose one of:
- SMS: Meta/Twilio sends a code to your number via text.
- Voice Call: You receive a call reading out the verification code.
Ensure:
- Your number is active and not on Do Not Disturb (DND)
- You are not blocking unknown SMS/calls
- It’s a mobile or landline number (landlines can only use voice call)
VOIP numbers (like Google Voice or Skype numbers) usually do not work.
Register Your Own Number in Twilio for WhatsApp
A. Initiate WhatsApp Sender Setup in Twilio Console
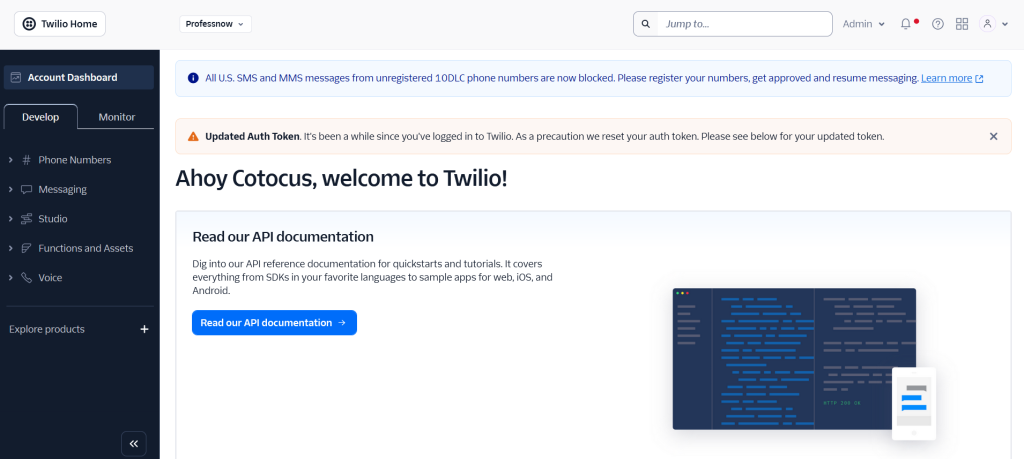
Step 1: Log in to Twilio Console
- Visit: https://console.twilio.com/
- Sign in with your Twilio credentials (must have a verified account and billing enabled).
Step 2: Go to Messaging > WhatsApp Senders
- In the left navigation menu:
- Click “Messaging”
- Then choose “Senders”
- Select “WhatsApp Senders”
Step 3: Start Adding a Sender
- Click “Get Started” (if this is your first sender)
- Or click “+ Create new sender”
Step 4: Choose to Use Your Own Phone Number
- Select the option “Use your own phone number” (not a Twilio-owned number).
- This is part of Twilio’s BYON (Bring Your Own Number) flow.
- ✅ Note: The number must not be in use with WhatsApp currently. Delete the account if needed.
B. Enter Business and Number Details
Step 1: Add Business Display Name
- This is the name customers will see when chatting with your business.
- Make sure it matches your brand identity.
- Meta will verify and approve this name.
Step 2: Select Category and Description
- Choose your Business Category from the dropdown (e.g., Healthcare, Education, Travel, etc.)
- Add a short description of your services — Meta uses this to determine eligibility.
Step 3: Enter Phone Number (E.164 Format)
- Format:
+followed by country code and number (e.g., +918888776655) - Must be capable of receiving SMS or voice for verification.
Step 4: Select Your Meta (Facebook) Business Account
- If your Meta Business Account is already verified, select it from the dropdown.
- If it’s not linked:
- Twilio will redirect you to Facebook login
- Log in and authorize access to your Meta Business Manager
Note: Ensure your Meta account is verified or in the verification process.
C. Verify Phone Number
Step 1: Receive Verification Code
- Twilio will send a 6-digit code to your number:
- Via SMS or
- Voice Call (if number doesn’t support SMS)
Step 2: Enter Code in Twilio Console
- After receiving the OTP, enter the code in the Twilio prompt.
Optional: Voice-only Number? Use Webhook
- If you’re using a landline or voice-only number:
- Set up a Twilio webhook to forward voice call audio (with code) to email or recording.
- Or use Twilio Call Forwarding to another mobile number.
D. Finalize WhatsApp Sender Registration
Step 1: Twilio Completes WABA Setup
- Twilio will:
- Register the number with WhatsApp API
- Assign it to a WhatsApp Business Account (WABA) in your Meta Business Manager
Step 2: Number Becomes Active in Twilio
- Your number will now appear in the “Approved Senders” list in:
- Twilio Console → Messaging → WhatsApp Senders
You can now:
- Send production-ready messages to opted-in users
- Manage message templates (like OTP, welcome, reminders)
- Track delivery and engagement using Twilio’s logs
Configure Messaging and Templates
A. Create a Messaging Service (Recommended)
Creating a Messaging Service is the best practice when managing WhatsApp messaging at scale in Twilio.
Step 1: Open Twilio Console
- Visit: https://console.twilio.com/
- Sign in with your Twilio account.
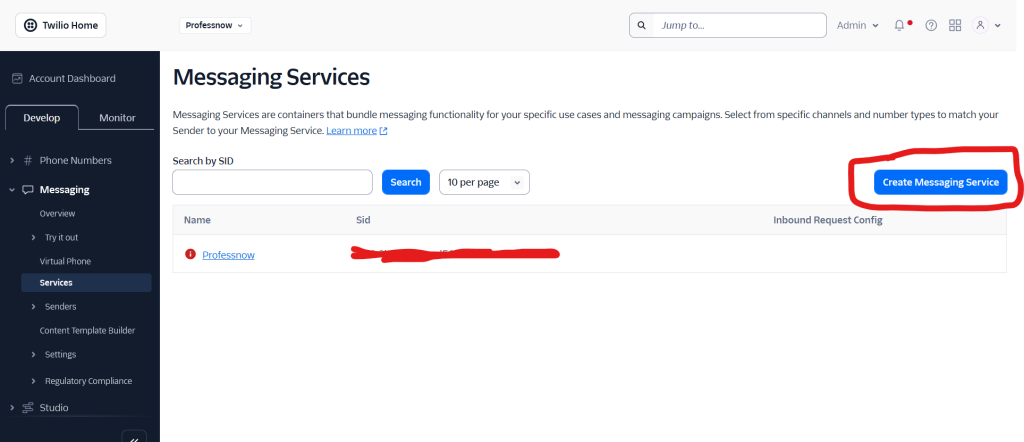
Step 2: Navigate to Messaging > Services
- In the left sidebar, click:
- Messaging
- Then click on Services
- Click the “+ Create Messaging Service” button.
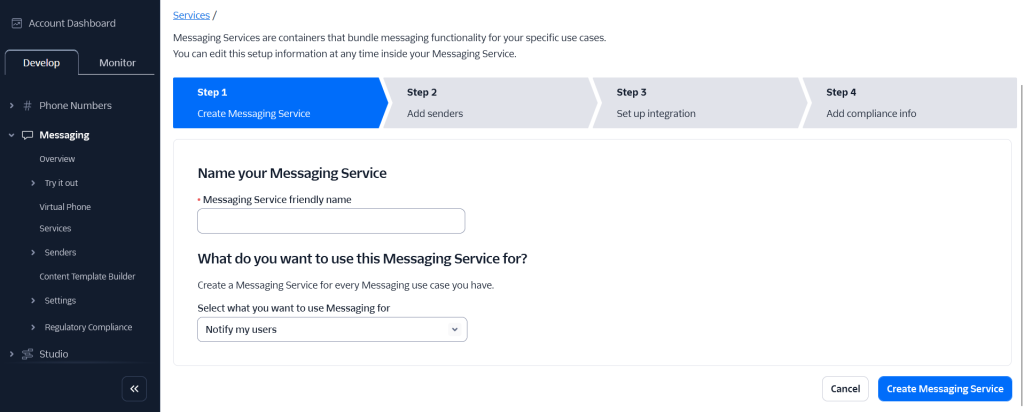
Step 3: Fill Messaging Service Details
- Name your messaging service (e.g., “My WhatsApp Service”)
- Choose “Use Case” (e.g., Notifications or Customer Care)
- Click Create Messaging Service
Step 4: Add Your Approved WhatsApp Sender
- Go to Sender Pool tab of the service.
- Click “Add Senders”
- Select your WhatsApp-approved number from the list (the one registered in earlier steps).
Now your Messaging Service is linked to your WhatsApp number.
Step 5: Configure Messaging Settings
You can choose how to handle incoming and outgoing messages:
Option 1: Webhook URLs (Custom Logic)
- Go to “Inbound Settings”
- Set “Request URL” to your API endpoint (for incoming messages)
- Set “Status Callback URL” for delivery status updates (optional)
Option 2: Twilio Studio (No-code automation)
- Use drag-and-drop logic to:
- Send replies
- Log interactions
- Connect to APIs
Option 3: Twilio Functions (Serverless backend)
- Add small scripts to handle incoming messages or route them.
Example Webhook Setup:
- Request URL:
https://yourserver.com/twilio-incoming - Status Callback URL:
https://yourserver.com/message-status
This tutorial is very well written and easy to understand. I liked how it clearly explains how to bring your own number to Twilio for WhatsApp notifications. The step-by-step approach makes it simple even for someone new to this. I feel confident trying it myself now. Thanks for sharing such a helpful guide!